I think it’s fair to say that I have A LOT of garlic! It all came courtesy of my farm share, but I don’t mind a bit. Garlic is a great addition to almost any dish and can be expensive at the grocery store.
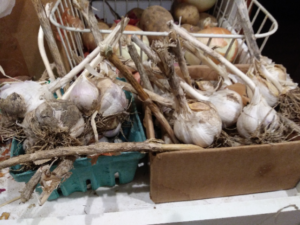
The variety in my garlic stash is called hardneck because of the hard stalk that holds the cloves together. It is different than the softneck variety in grocery stores, and is bred to have very large, easy to peel cloves.
One of my favorite uses for garlic is Roasted Garlic Sauce. Winter is the perfect time for the long slow roasting that turns garlic into a completely different animal — soft, sweet and mellow. Once roasted, whir it up into a sauce for a super easy way to jazz up vegetables, especially winter vegetables, like Brussels sprouts, carrots, beets, kale and broccoli.
In fact, you may remember last month’s article: Adventures with Brussels Sprouts . . . and the Goldilocks Problem. Once you have a nice batch of roasted sprouts, toss it with this sauce and a little lemon juice for a real treat.
Picture Recipe: Roasted Garlic Sauce
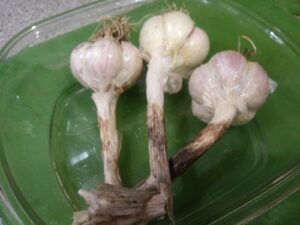
Step 1: Roast the Garlic
- 1-2 heads of garlic
Preheat oven to 325 (F). Rinse garlic heads to remove dirt, if any. Place in a small baking dish with a lid. Rub with olive oil to coat. Cover, place in oven on a middle rack and bake until tender, which will take anywhere from 45 minutes to an hour or more.
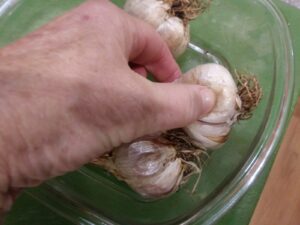
Cloves are done when they squish in as you gently press them.
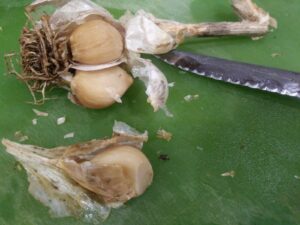
Step 2: Remove the Roasted Garlic Cloves
Once garlic has cooled enough to handle, use a serrated knife to slice off the root end of the cloves. They should then fall out of their skins fairly easily, but if not, squeeze them out the cut end.
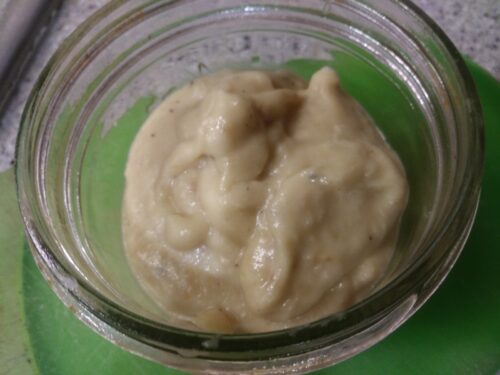
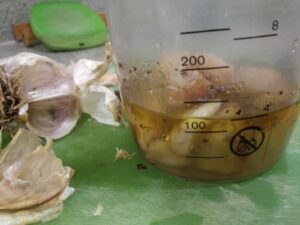
Step 3: Prepare the Sauce
- 1-2 heads of roasted garlic cloves, skins removed
- 2-4 Tbsp. olive oil
- Sea salt and freshly ground pepper
Combine peeled cloves, oil and salt and pepper in the cup of immersion blender and blend until smooth and creamy.
The oil measurement is not exact and depends on how much garlic you use and how thick you want the sauce. I added oil to cover the cloves and reach the 4 oz. (1/2 cup) mark on my blender cup. If in doubt, start small and add more as needed to make a sauce to your liking. Mine came out fairly thick which helps it better adhere to vegetables.
Step 4: Serving
- Freshly squeezed lemon juice, to taste (optional)
Stir sauce into hot cooked vegetables and sprinkle with lemon juice, if desired.
Notes:
- Add Some Herbs! Experiment by adding fresh or dried herbs, e.g., a teaspoon of fresh minced rosemary, 1/4 tsp. dried leaf thyme, 1/2 tsp. rubbed sage, etc.
- Double Up If I am going to the trouble of roasting garlic I’ll do three or four heads at a time. It lasts quite a while in the fridge and has many uses.
- Oven Temps Although you can speed up the roasting time by using higher heats, it’s easy to burn the garlic this way and the garlic often doesn’t become as soft and mellow tasting. I usually roast garlic in the toaster oven so I don’t have to heat my regular oven to cook such a small item that needs such a low heat.
- Peel While Warm Try to remove the cloves when the garlic is still warm, before refrigerating. It will be easier to remove the cloves and they will blend more readily in the sauce.
- Manual Optio If you don’t have an immersion blender, the sauce can be made by mashing everything together in a shallow bowl using a large salad serving fork. Be sure to mash while still warm as the cloves harden as they cool, making it difficult to blend into a sauce.
1 thought on “Recipe: Jazz Up Veggies with 3-Step Roasted Garlic Sauce”